Thursday, 24 April 2014

Roto and auto tracking tutorials

First we started the class with rotoscoping, where we are to add key lights to the actor in a green screen to create a different environment.


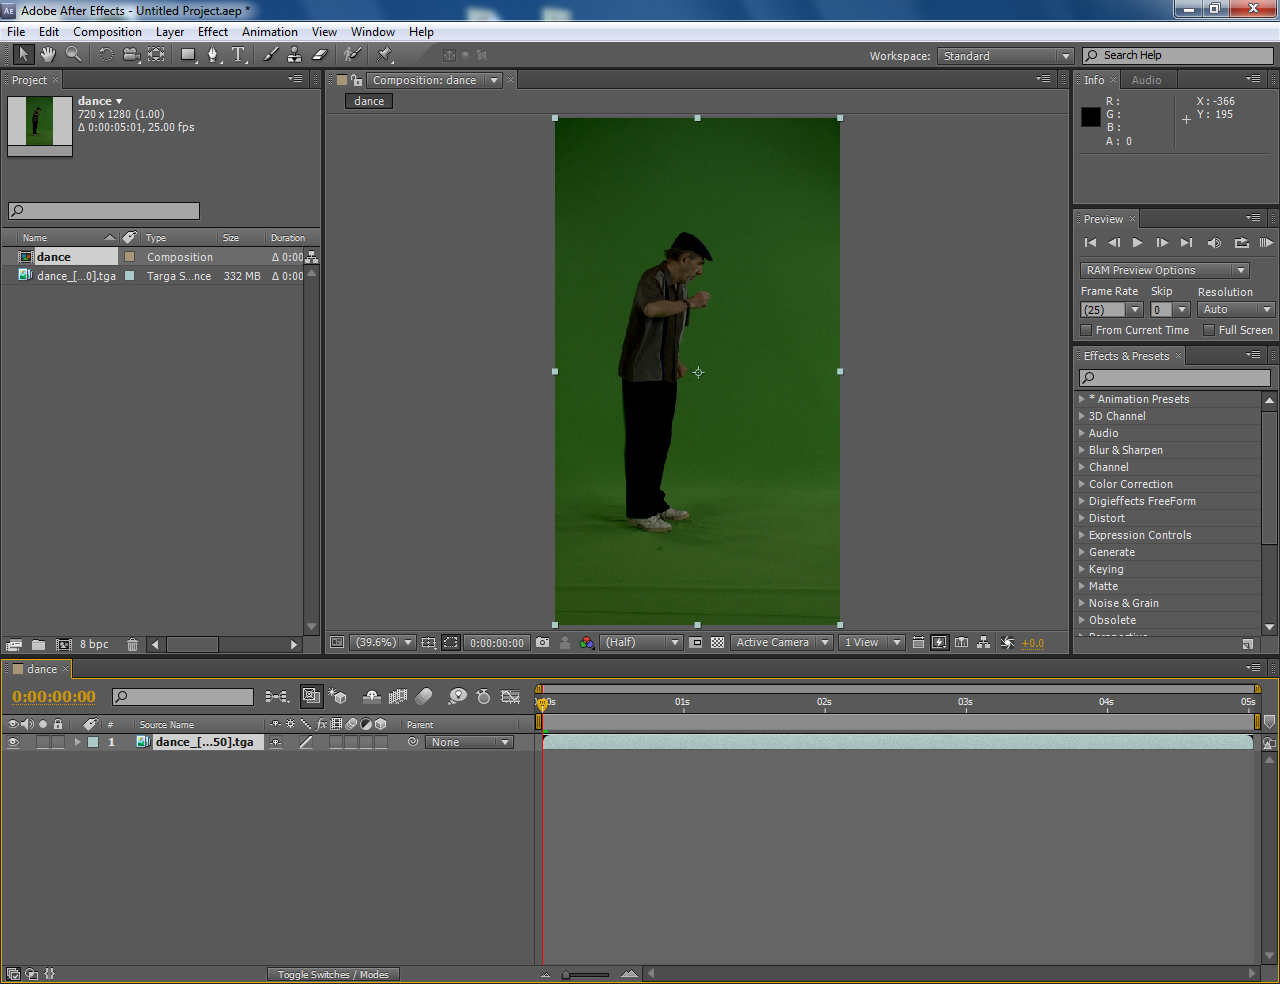
The guy dancing on the green screen. This is the original video.


After that, I added the color correction to make the background brighter and the ground color closer to the wall.


Later add in color key to remove the unwanted background. It can be applied in many layers in order to remove the background completely. However, it has to avoid from covering the main object.


Next I have to do the rotoscoping on the feet since the feet has a shadow and the shadow is not quite stable in a spot, rotoscoping it is required. This step will have to do it movement by movement in different layer for different object. In this case, one for right leg and the other for left leg.


Lastly it's to combine it with the background given and the masked video. This is not mine original one, this is the video that Mr.Kim boon did. So what I did was to add the reflection and shadow behind the man.


The final outcome

Next tutorial is about adding the auto tracking. Basically only the still pixel (or the part that doesn't have reflection) can be track.


This is the tryout to see how many trackers can we find.


Ended up deleting the previous ones and added a null object instead.


After that, change the color correction to make it seems like it is in the night time.


This is the outcome without the headlights.


The outcome with headlights..

Though this is not much effort in it… it's just an exercise.. we are meant to practice on our own...


Tuesday, 22 April 2014

Blood is thicker than water!

Learnt on how to make a water effect on a surface using the default effects. So this, we started from scratch. This one we separate all of them into 5 compositions.


The water fractal

Text


Combine both

Most features has to be explore by one's self and most of this is from the effects given in the Adobe After Effect.

Final outcome

Thursday, 17 April 2014

Toddler Steps?

From the first class until last week, Mr.Kim Boon always do the tutorial with us step by step. Starting today, he would like to try something different. He would give us the link to study and will ask us to do certain things in After Effect. So instead of just spoon feeding us, we finally have to practice individually and create our final outcome (of the video). He also mentioned that starting next week, we will start learning to implement the AE on live action videos.


I started on the butterfly since it is the main object. Parent the wings to the body, I start to animated the flapping wings first before doing the moving butterfly.


When I'm done, I make a path for the butterfly and change it's rotation to match the flying way of a butterfly.


Added the text in it.


Next, making the background in a different composition. Here we are free to do how we like as it's not the main objective of this exercise. So I just duplicate the flower pattern shape to create a better contrast of it and the other background.

Lastly, I add the butterfly changed into a different color by duplicate the butterfly composition and make it into a ramp. From there, I just adjust the mask and mode to get to the right one that I prefer.


the butterfly after 'transformed'


The final outcome. I know the butterfly flapping is a little bit off. Excuse me for that.


The original video. Since we are free to change a few things, it doesn't 

Wednesday, 16 April 2014

Bussiness card shatter tutorial

We learned to do a rainbow light on a card as the card shatter into pieces.


Firstly, we created four composition; card, rainbow, ramp and main. In the ramp, we just apply ramp to it. From the main, we added the card and the ramp in. 

So, depending where is the white of the ramp, the shatter shall begin there.


After we added the shatter effect of the card, we were told to play around with it. And so I change a few attribute and play about the given choice to it. 


And here is the rainbow composition. We added a ramp (first - if not it wouldn't work) and add in colorama. This gives it a rainbow color effect, just like the image below.


When all is done, the three component; ramp, rainbow and the card is added into the main comp. From there, it is edited to make the rainbow "transformed" the card into shattered pieces.


Final outcome


Final outcome reverse

From the final outcome, we copy its composition and enable time remapping. From here, we just swap the time's keyframe and viola! It's in reverse.

Thursday, 10 April 2014

Planets, text and shadow….

We learned today is to do the panning and rotate of the text in a commercial and also the shadow effect at the back.


After I duplicated a few of the text (to create the 3D effect), I added the light with the text have shadows at the back. Other than that, I also edit the movement so that it has that commercial feel.


Kind of similar as the one above. However there are different movement, that is move from small to big and have the lens blur. Honestly, I had quite a problem in following this. Probably I was distracted awhile before following the steps Mr.Kim Boon was teaching.


Lastly, I learned to view the universe in a camera angle and rearranging them. I begin with arranging the planets in a slightly zic-zac and turning more to the right. From the new created camera, I adjusted the point of interest and the dots that represent the position of the camera. After done, I apply the orient pathway, which makes the planets more 3D. As the final touch-up, I added CC Starburst spin from the effect. 


Tuesday, 8 April 2014

Coming up next and text with moving objects

A "coming up next" advertisement is what we learned today. Here's the original video that we used as reference:


So we had to do the "lower-third" section of the screen first, which is the part where the text appeared from.

We created the background from scratch (create a solid) and we added ramp into the layer as effect. After that we adjust the color.

Added the animation and the mask feather at the end to make a smooth (yet not too square-ish and looks like a dead end)


Added the mosaic effect by adding the mosaic and masked it into the middle bar.
Duplicate the middle bar and add the mosaic effect and fit it to screen. After that, add ramp (luma) and change the mode to overlay.

Then finally add in the motion graphic in the back and added the sun flare for better effect. 


The outcome of the advertisement.

A short tutorial on how to mask the text over an image.

Another exercise we do is a simple rotating light in a ball shape.

After adjust the glow, intensity and etc, duplicate them and adjust to how I want it.

Finally, group them into null object and parent them to it.

right click > find null object

When done, just create a new camera and adjust its angle.

Friday, 4 April 2014

AE exercises from other class.

Since in Information Design (ID) I will also learn about After Effect, I thought maybe I should post it here too. At least it shows how I got a certain skills in AE.


A very simple exercise where we learn to mask in the handwriting style. Here, we learned to use the stroke effect.

Mask using pen tool > add stroke > change brush size > start time from 0% and end it with 100%